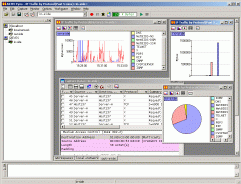
 Workspace

 Changing Workspace Name
- Click on the tab of the target workspace with the right
mouse button, and choose Properties from
the menu.
The Workspace Properties dialog box will appear.
You can change the workspace label in it.
 Automatic selection of the interface
- By binding a workspace to an interface, the corresponding
interface will be automatically selected when you select
the workspace.
In order to bind a workspace to an interface, click on the tab of the target workspace with the right mouse button, and choose Properties from the menu. The Workspace Properties dialog box will appear. Select the Bind to interface check box, and choose the desired interface from the drop down list.
 Moving a Window to Another Workspace
- Click on the title bar of the window with the right mouse
button. A popup menu will appear. Choose the target
workspace from the menu. Choosing New
Workspace will create a new workspace and move the window you
clicked into it.
 Selecting a Workspace from Keyboard
- You can select a workspace with the keyboard. Press the
<Ctl-Alt- key or >
><Ctrl-PageDown> key to select the next workspace. Press the<Ctl-Alt- key or >
><Ctrl-PageUp> key to select the previous workspace.  Setting Focus onto Interface Selector window with Keyboard
- Press the
<Alt- key to set input focus on Interface Selector window. Press the >
><Alt-2> key to set focus on message window. Press the<Alt-0> key to set focus on a window in the workspace.
 Decode View, Stream View


 Configuring Decode Hints
- ASTEC Eyes cannot always identify the protocols when
the ports used are not the standard ones (well-known ports).
When appropriate decode hints are provided,
ASTEC Eyes will identify the protocols with non-standard ports,
too. You can configure the decode hints on
Decode Hints tab of the Configure Options dialog box.
 Navigating among the Packets While the
Focus is set on the Packet Detail Pane or Dump Pane
Navigating among the Packets While the
Focus is set on the Packet Detail Pane or Dump Pane- Even while the focus is set on the packet detail pane or the
dump pane, you can navigate among packets (or records)
by pressing <Ctrl-
 > and
<Ctrl-
 >.
>.
 Displaying the Stream Containing a Packet of Interest
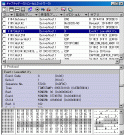
- Click on the row for the packet of your interest in the Summary
pane of the decode view with right mouse button.
A popup menu will appear.
Choose Show Stream View, and the stream view
with the only one stream containing the packet will be shown.
 Searching the Packets Contained in a Specific Stream
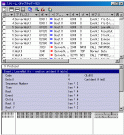
- Clicking on a record on the stream view will highlight the
corresponding packets in green in the Summary pane of the decode view.
Pressing the <Alt-
 >
key or the <Alt-
 > key
on the decode view will select the
next or previous highlighted packet respectively.
 Aggregating the Results of Multiple Filtering with
Convenience Filter
Aggregating the Results of Multiple Filtering with
Convenience Filter- The header attribute filters and the caption filters,
when more than one of them are applied,
work as filters combined by logical AND, that is,
only those packets which match all the filters applied
will be displayed.
Though no direct means to apply filters with logical OR
directly are provided, you can obtain the same result
using check marks in the Frame ID column.
First, apply the first filter (for example, Source Address of the caption filter). Click on Frame ID header of Summary pane, and choose (Enable Check Marks). All the packets displayed whill be marked with check marks.
Second, reset the current filter and apply the second filter (for example, IP protocol of the header attribute filter). Mark the packets displayed in the same way as above.
After applying the filters and marking the packets (or records) you want, choose check mark (
 )
from Frame ID of caption filter.
All of the marked packets (or records) so far will be displayed.
 Monitor Window

 Changing the Unit for the Traffic Volume or Y-axis of a
Chart
Changing the Unit for the Traffic Volume or Y-axis of a
Chart- The unit for the traffic volume is bytes by default.
You can change the unit from the Advanced dialog box.
Click on the Monitor window with right mouse button and choose Advanced... from a popup menu, the Advanced dialog box will appear.
Choose the unit of traffic volume from the drop down list.
 Displaying the Breakdown in a New Window
- When you displays the breakdown chart of a chart item,
seleting the menu item
while holding down the <Shift> key
will show the breakdown chart a new window.
The original chart is kept in the first window.
 Selecting a Graph Item Difficult to Select
- Sometimes it is not easy to select a line element in a chart
by clickint on (Graph Item) when many Graph
Items are displayed.
If this is the case, you can use the table format instead.
First, show the data in the table format and then select the row for the desired Graph Item, and revert to the previous chart. The target Graph Item will be selected in the line chart, too.
When there are many Graph Items, searching the table by the text is recommended.
 Monitoring Oly What Is of Interest
- You can use monitor filter to display a certain portion
of the entire traffic.
You can specify different filter conditions
and analyze the traffic from various viewpoints.
 Extending Monitoring Period
- ASTEC Eyes displays the traffic in each 5 minutes period by default.
You can choose 5, 10, or 30 minutes as monitoring unit period
from the Monitor page of Configure Options dialog
box. You can also select the refresh interval of monitor windows.
 Displaying the Newest Event in the Event Viewer
- A new event is appended at the bottom of event viewer.
Selecting the bottom row (the last event) will make the last
event selected while new events are added.
By this, you can always view the latest event without scrolling.
 Miscellaneous
 Registering Network Interface Label to Remote Module
- The name of the interface registered to the Remote Module
as network interface label will also be displayed as interface
name when ASTEC Eyes on other hosts connect to the same Remote
Module.
You can register label in the Interface Properties dialog box.  Configuring the Host Name
- You can name hosts freely for your convenience.
Enter arbitrary host names in the User Defined Name
column of Edit MAC Address Book or
Edit IP Address Book window.
ASTEC Eyes can use User Defined name, NetBIOS name, NIS name, or DNS name for display. Which name will be actually used depends on the preference and the search result. In order to control which name is used, you need to configure the preference correctly. You can configure the preference in the Display Host Name page of the Configure Options dialog box.
 Interoperability with Other Applications
- You can copy, by copy and paste operation, the monitor information or the analyzed data in the decode view, stream view, charts, and tables into other application For instance, you can copy a monitor window chart as image (e.g., bitmap format) or text (pain text or CSV format). To copy something into Microsoft Word or Microsoft Excel, first select an appropriatge format and then paste it.

